Replicating Google’s Pull-To-Refresh SVG in React Native
Why not use the built-in Refresh component from react native
- It offers limited customization options
- The loading state is a simple boolean that might not be enough to cover some UI/UX requirements
- The pull to refresh component offered by Android’s swipe refresh layout looks fun 😜
The goal
To replicate this animation with react-native-svg and utilise react-native-reanimated to ensure that calculations are ran on the UI thread to optimize perfrormance, and if possible share the same code across mobile and web for easier maintenance

Challenges faced
- react-native-svg behaves differently on web and mobile, for example: some props can be animated on mobile but can’t be animated on web and vice-versa due to how the package works internally
- issues with applying translate and rotation props to react-native-svg paths
Solutions
- react-native-skia was able to solve the previously mentioned issues, but i didn’t wanna introduce a new package to the code base just for this purpose
- the solution i settled on was animating the path itself and drawing the arrow and circle manually instead of relying on animated transformations
Requirements
- We’ll need an arc that grows to become a circle as the animation progresses
- An arrow head that grows to full length as the animation progresses
To create the arc we need a function that takes the circle dimensions and a rotation angle and returns the arc’s svg path
const polarToCartesian = (centerX: number, centerY: number, radius: number, angleInDegrees: number) => {
    'worklet';
    const angleInRadians = ((angleInDegrees - 90) * Math.PI) / 180.0;

    return {x: centerX + radius * Math.cos(angleInRadians), y: centerY + radius * Math.sin(angleInRadians)};
};

const describeArc = (centerX: number, centerY: number, radius: number, startAngle: number, endAngle: number) => {
    'worklet';
    const start = polarToCartesian(centerX, centerY, radius, endAngle);
    const end = polarToCartesian(centerX, centerY, radius, startAngle);

    const largeArcFlag = endAngle - startAngle <= 180 ? '0' : '1';

    const d = `M ${start.x} ${start.y} A ${radius} ${radius} 0 ${largeArcFlag} 0 ${end.x} ${end.y}`;

    return d;
};
Then, to create the arrow head we’ll need a function that takes in the ending point of the arrow, arrow width, and the rotation angle and outputs the coordinates of the 3 points that define the triangle
type Point = {x: number; y: number};

const calculateArrowhead = (endPoint: Point, endAngle: number, arrowLength: number, arrowWidth: number) => {
    'worklet';
    const endAngleRad = endAngle * (Math.PI / 180);

    // Calculate the direction vector for the arrowhead base
    const baseVector = {
        x: arrowWidth * Math.cos(endAngleRad + Math.PI / 2),
        y: arrowWidth * Math.sin(endAngleRad + Math.PI / 2),
    };

    // Calculate the left and right base points
    const farBase = {x: endPoint.x + baseVector.x / 2, y: endPoint.y + baseVector.y / 2};

    const closeBase = {x: endPoint.x - baseVector.x / 2, y: endPoint.y - baseVector.y / 2};

    // Calculate the tip of the arrowhead
    const tip = {
        x: endPoint.x + arrowLength * Math.cos(endAngleRad),
        y: endPoint.y + arrowLength * Math.sin(endAngleRad),
    };

    return {closeBase, farBase, tip};
};
Then we need to create our animated path component with the createAnimatedComponent method from reanimated, calculate the paths for the arc and arrow head based on the animation progress, and pass the resulting paths to our new animated component
import type {ColorValue} from 'react-native';
import Animated, {Extrapolation, interpolate, useDerivedValue, type SharedValue} from 'react-native-reanimated';
import {Svg, Path} from 'react-native-svg';

const AnimatedPath = Animated.createAnimatedComponent(Path);

const startingAngle = 0;

type AnimatedRefreshSVGProps = {
    size: number;
    progress: SharedValue<number>;
    strokeWidth: number;
    color: ColorValue;
};

export const AnimatedRefreshSVG: React.FC<AnimatedRefreshSVGProps> = (props) => {
    const {size, progress, strokeWidth, color} = props;
    const centerX = size / 2;
    const centerY = size / 2;
    const radius = size / 4;

    const angle = useDerivedValue(() => {
        return interpolate(progress.value, [0, 100], [0, 300], Extrapolation.CLAMP);
    });

    const arrowWidth = useDerivedValue(() => {
        const scale = interpolate(angle.value, [0, 60, 300], [0, 0, 1], Extrapolation.CLAMP);
        return strokeWidth * 3 * scale;
    });

    const arcPath = useDerivedValue(() => {
        return describeArc(centerX, centerY, radius, startingAngle, angle.value);
    });

    const arrowPath = useDerivedValue(() => {
        const halfArrowWidth = arrowWidth.value / 2;
        const arcEndPoint = polarToCartesian(centerX, centerY, radius, angle.value);
        const {closeBase, farBase, tip} = calculateArrowhead(
            arcEndPoint,
            angle.value,
            halfArrowWidth,
            arrowWidth.value,
        );
        const d = `M ${closeBase.x} ${closeBase.y} L ${tip.x} ${tip.y} L ${farBase.x} ${farBase.y} Z`;
        return d;
    });

    return (
        <Svg style={{height: size, width: size}} viewBox={`0 0 ${size} ${size}`}>
            <AnimatedPath stroke={color} fill={'transparent'} strokeWidth={strokeWidth} d={arcPath} />

            <AnimatedPath d={arrowPath} fill={color} stroke={color} />
        </Svg>
    );
};
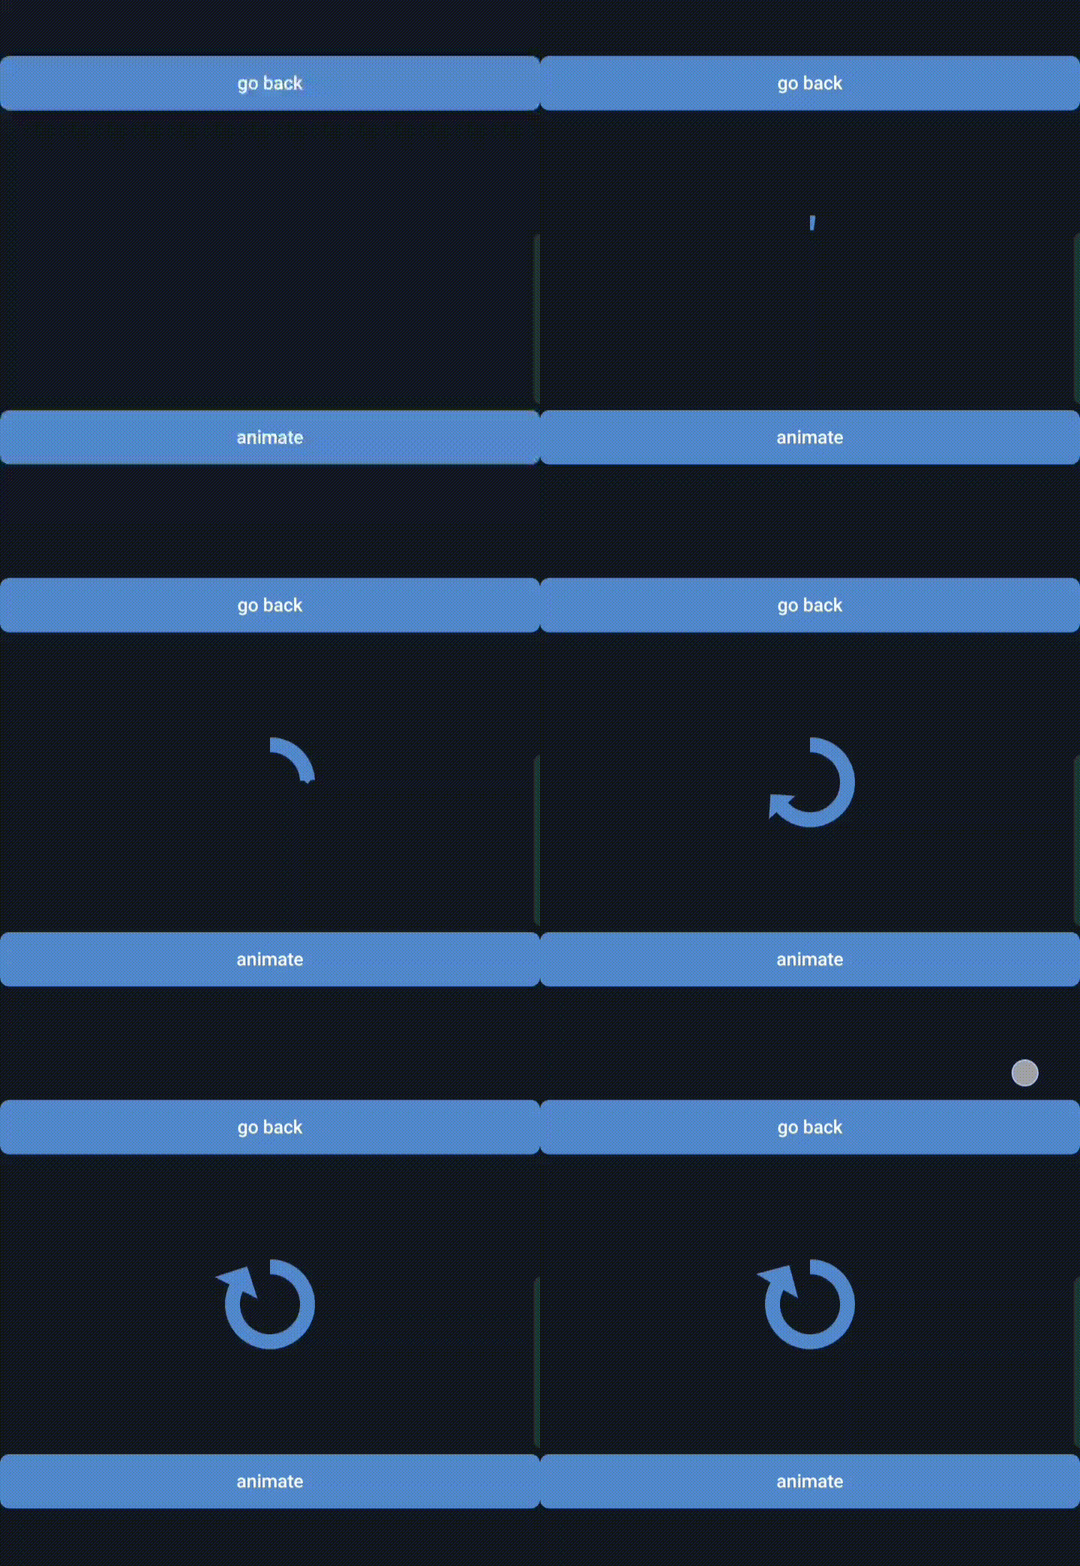
The end result would look something like this, which achieves our main challenge of animating the svg, and the rest would be to show this component above our scroll view and animate its other props like scale and opacity based on the gesture direction and Y axis movement, which will be discussed in a future blog post

